
Every morning, countless people reach for their makeup bags, transforming their faces into canvases of expression, confidence, and creativity. Whether it’s a swipe of mascara to enhance the eyes or a dash of lipstick to complete a look, makeup serves as more than just a daily ritual. For many, it’s a bridge to self-confidence, a tool for self-expression, or even a comforting morning habit.
Table of Contents
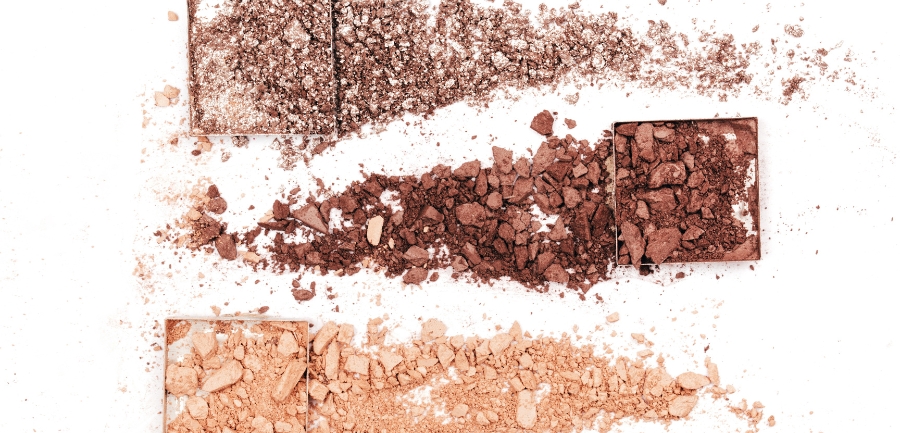
But, let’s be honest: who hasn’t experienced the mini-heartbreak of dropping a brand-new eyeshadow palette or discovering a favorite highlighter shattered into a million pieces? Damaged makeup isn’t just about the wasted product; it’s about the broken piece of our daily armor. The good news? Instead of tossing these beloved items in the trash, there are effective ways to breathe life back into them. In this post, we’ll delve into the art of saving your damaged makeup, ensuring that no broken eyeshadow or hard-panned blush goes to waste. Let’s dive in and mend those makeup wounds!
How to Fix a Broken Eyeshadow
We’ve all been there. One clumsy moment and that perfect shade of eyeshadow smashes into countless fragments. But before you even think about tossing it, let’s embark on a rescue mission.
Understanding the Damage
Before diving into repairs, let’s first assess the situation.
- Assessing the extent of the breakage: Begin by carefully observing the broken eyeshadow. Are there large chunks or is it finely powdered? Not every break is the same, and understanding the damage will guide your repair process.
- Deciding if the eyeshadow can be fixed or needs replacement: If there’s mold, a peculiar scent, or the eyeshadow is incredibly old, it might be time to part ways. Safety first! But for the usual drops and breaks, there’s hope.
Gather the Necessary Tools
Now that we’ve assessed the situation, let’s gear up! For this DIY, ensure you have:
- Rubbing alcohol: This helps bind the powder.
- A spatula or a toothpick: Ideal for crushing and mixing.
- Tissue paper: For pressing and setting.
- A coin or flat press: To ensure a smooth, even finish.
The Repair Process
Let’s get that eyeshadow back to its former glory!
- Step 1: Crushing the eyeshadow further: This might sound counterintuitive, but we need a uniform powder to ensure smooth repair. Gently crush using your spatula or toothpick.
- Step 2: Adding a few drops of rubbing alcohol: Pour it sparingly. You want a paste-like consistency, not a liquid.
- Step 3: Mixing and smoothing: Use your tool of choice to mix until smooth.
- Step 4: Pressing down with tissue and coin: Lay a tissue over the eyeshadow, and using the coin or press, apply even pressure. This removes excess alcohol and sets the eyeshadow.
- Step 5: Letting it dry: Patience is key. Let your eyeshadow sit for several hours, ideally overnight, to completely dry.
And voila! Your eyeshadow is ready to add that sparkle to your eyes once again. Remember, makeup, like life, has its mishaps. But with a little knowledge and some handy tricks up our sleeve, we can fix just about anything!
Fix Broken Highlighter

Shimmer and shine, highlighters are the magic dust that gives our skin that radiant glow. But they can be fragile creatures. Let’s delve into the why and the how of mending these luminous beauties.
Why Highlighters Break
- Discussing the soft texture and malleability of highlighters: Unlike some other makeup products, highlighters often possess a soft, buttery texture. This makes for a gorgeous glide onto the skin, but it also means they’re susceptible to breakage with just a slight mishap.
- Impact of temperature changes: Ever left your makeup bag in a hot car? Temperature fluctuations can cause your highlighter to expand and contract, leading to cracks or complete breaks. Sudden colds can make them brittle, while heat can soften and even melt them.
Repairing Broken Highlighter
The road to restoration for a highlighter is quite similar to eyeshadows but with a couple of additional considerations.
- Texture: Highlighters, especially baked ones, may have a different consistency compared to eyeshadows. This can affect the amount of rubbing alcohol you need. Always start with a few drops and add as needed to get that moldable paste.
- Shimmer: The reflective particles in highlighters mean we need to be extra careful when mixing. Ensure you blend smoothly to keep that glow even and not patchy.
- Crush, Mix, and Press: Just as we did with the eyeshadow, begin by crushing the broken highlighter into a fine powder. Gradually add rubbing alcohol to form a smooth paste. Once mixed, press down using tissue paper and a coin or flat press, ensuring that the shimmer spreads evenly.
- Dry Time: Let your highlighter rest and dry out. It’s tempting to test that glow, but waiting ensures the alcohol completely evaporates and you’re left with a seamlessly repaired product.
Shattered highlighter doesn’t mean dimmed radiance. With a bit of care, you can restore its luminosity and keep your glow game strong. Keep shimmering!
Ruined Makeup
In the world of makeup, few things are as disheartening as opening your favorite product only to find it’s been ruined. But fear not! With a dash of knowledge and a sprinkle of care, you can fend off most makeup maladies.
Causes of Ruined Makeup
Let’s first shine a light on the usual suspects behind these makeup tragedies.
- Exposure to moisture: Ever noticed those little clumps or a change in texture? Moisture can be a silent enemy, sneaking into your products and causing them to deteriorate faster.
- Incorrect storage: That sunny windowsill might be perfect for your plants, but makeup? Not so much. Heat, light, and fluctuating temperatures can alter the composition of your products.
- Bacterial contamination: From fingers to brushes, anything that comes in contact with your makeup can introduce bacteria, leading to discoloration, off smells, or even mold.
Prevention is Better than Cure
As the age-old adage goes, preventing damage is always better (and often easier) than fixing it.
- Storage tips: Always store makeup in cool, dry places, away from direct sunlight. Dedicated makeup organizers or even simple drawers can be game-changers.
- Regular cleaning of makeup tools: Clean brushes are more than just good for application; they help extend the life of your makeup. Make it a habit to wash your brushes at least every two weeks and sponges even more frequently.
Quick Fixes for Ruined Makeup
Sometimes, despite all precautions, we face makeup mishaps. Here’s how to address some common ones:
- Drying out wet makeup products: If your powders get wet, leave the lid open and let them air dry. If it’s a cream product, blot away excess moisture gently with a tissue.
- Scraping off the top layer of contaminated products: If you spot mold or the surface looks off, gently scrape away the top layer with a clean spatula. But remember, if the product smells bad or causes irritation, it’s best to toss it.
- Tips for saving dried-out mascaras or eyeliners: A drop or two of saline solution (like the kind for contact lenses) can rejuvenate dried-out mascara or eyeliner. Stir gently and watch the magic happen!
Though it can be heart-wrenching to see ruined makeup, there’s almost always a way to save or extend the life of your beloved products. A touch of vigilance and a pinch of knowledge will keep your makeup collection in top shape!
Can You Use Eyeshadow as Blush?
Ever gazed at that stunning peach or rosy eyeshadow and wondered if it could give your cheeks a pop of color? The world of makeup is boundless, and with a bit of creativity, products can serve multiple purposes. Let’s explore the exciting journey of using eyeshadow as a blush!
Multipurpose Beauty Products
Benefits of using makeup products in versatile ways:
- Economical: Instead of buying a separate product for every need, why not get more out of what you already own?
- Travel-friendly: Packing for a trip? Multipurpose products reduce the amount of gear you need to lug around.
- Unleashing Creativity: Experimenting with products can lead to discovering new shades and looks that become your next favorite.
Money-saving tips:
- Double-duty products can save you from purchasing items you might not use often. That metallic bronzy eyeshadow? It could be a great highlighter too!
Using Eyeshadow as Blush: Steps and Tips
Transforming eyeshadow to blush isn’t just about slapping color on the cheeks. Here’s how to do it flawlessly.
Choosing the right eyeshadow color:
- Think about the shades that naturally flush your cheeks. Soft pinks, peaches, or even subtle mauves can be perfect.
- For deeper skin tones, richer shades like burnt orange or berry can be stunning.
- Remember, matte or satin finishes often work best, but if you’re in the mood for some sparkle, who’s stopping you?
Application techniques for a natural look:
- Start with a light hand: Tap off the excess from your brush to avoid a too-intense color payoff.
- Blend, blend, blend: The key to a natural-looking blush is in the blending. Soft circular motions help diffuse the color seamlessly.
- Location is everything: Apply the eyeshadow-turned-blush to the apples of your cheeks, blending slightly upwards for a lifted look.
The beauty landscape is vast and full of possibilities. By embracing a versatile approach, you can not only save money but also unearth new ways to shine and glow. So, the next time you’re eying that eyeshadow, why not give your cheeks a whirl?
Tackling Hard Pan Makeup

There’s nothing quite as frustrating as swiping a makeup brush over a once-beloved product only to find that it’s become unresponsive and sealed over with a hard layer. Welcome to the world of hard pan makeup. But fret not, we’ve got solutions to get your products back in action.
What is Hard Pan?
Definition: A hard pan refers to a dense, glazed-over layer that can form on the surface of powder makeup products. It creates a barrier, making the product beneath seem unreachable and often unusable.
Causes: This annoying phenomenon can occur due to various reasons, including:
- Oil transfer from the skin or brushes.
- Using damp brushes or fingers on powder products.
- Bacterial buildup over time.
Removing the Hard Pan Layer
Before you consider throwing away that compact, let’s try a few techniques to revive it:
- Using tape:
- Gently place a piece of transparent tape over the hard-panned area.
- Press down lightly.
- Slowly peel the tape away. You’ll likely notice the hard layer sticking to the tape, revealing usable product underneath.
- Gentle scraping methods:
- Using a clean mascara spoolie or a sanitized toothbrush, lightly brush the surface of the product. This method can dislodge the hardpan layer, but ensure you do it gently to prevent wastage.
Preventing Hard Pan

Prevention, as they say, is the best medicine. Here are some proactive measures to keep the hard pan at bay:
- Clean makeup brushes regularly: The oils and product residue on dirty brushes can contribute to the formation of a hard pan. A simple routine cleaning can go a long way in maintaining the quality of your makeup.
- Avoid using wet brushes on powder products: As tempting as it might be to intensify that eyeshadow color with a damp brush, remember that introducing moisture can lead to a hard pan. If you must wet your brush, make sure to clean the surface of the product afterward.
While hardpan can be a bothersome issue for makeup enthusiasts, it’s not the end of the road for your beloved products. With a little know-how and regular maintenance, you can keep your makeup collection in pristine condition, ready to help you shine every day.
To Wrap It Up
Navigating the world of makeup is as much about creativity as it is about care. As we’ve journeyed through the solutions for damaged makeup, it’s evident that many products can be salvaged with just a bit of knowledge and effort.
From expertly mending broken eyeshadows and highlighters to creatively repurposing eyeshadows as blush and tackling the pesky hard pan, there’s always a way to give your makeup a second chance at life.
It’s not just about fixing; it’s about prevention. Regular cleaning of brushes, proper storage, and mindful application can extend the lifespan of your favorite products. In the end, our makeup is an investment—both financially and emotionally. By looking after it with diligence, we ensure every swipe, dab, and blend brings out the best in us. So, here’s to a future of flawless applications and minimal makeup mishaps!
FAQs
How do you fix broken makeup without alcohol?
Gently crush the product, mix it with a few drops of witch hazel or rose water, press, and allow it to dry for a reconstituted finish.
Can you revive old makeup?
Some old makeup can be refreshed: Mascara with saline solution, dried gel liners with eye drops, and rehydrating cream products with natural oils.
How do you save a broken makeup palette?
Consolidate fragments, crush into a fine powder, add a binding agent like jojoba oil, press firmly, and allow to set for a revamped palette.
How do you fix a broken foundation on your face?
For a patchy foundation, dampen a beauty sponge and gently press to blend. Setting spray can also help meld and refresh uneven foundation layers.