
Hey, beauty enthusiasts! Ever wanted to swatch a lip gloss and thought, “If only I could tweak this shade a bit?” or “I wish this tasted slightly more of vanilla!”? Well, I’ve been there too. That’s what nudged me down the rabbit hole of crafting my own lip gloss.
Table of Contents
Imagine having total control over the shade, shine, flavor, and even the tube design. Pretty empowering, right? Join me as we explore the vibrant world of homemade lip gloss recipes. Whether you’re all about that organic vibe or hunting for that perfect shade of rose gold, I’ve got some insider tips to share. Let’s dive in and get glossy!
Lip Gloss Tubing
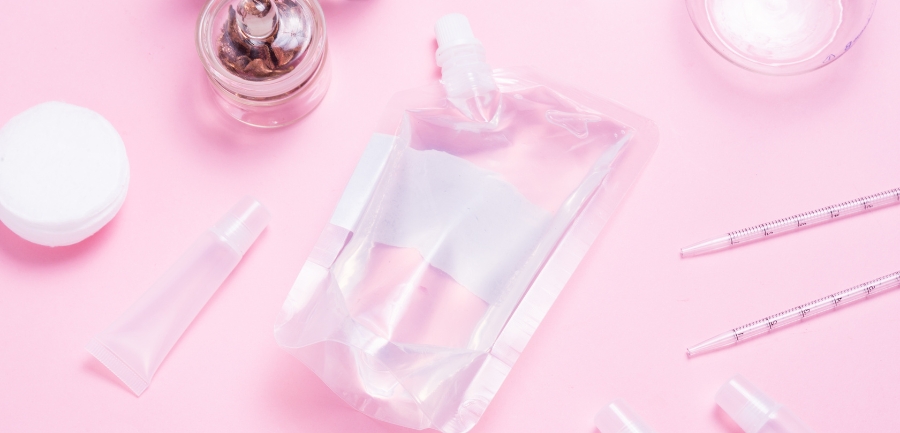
Every DIY lip gloss journey begins with a solid foundation: the tube! Now, you might be wondering, “Isn’t it just a container?” Oh, but there’s so much more to it than that. Let’s break it down.
Why the Right Tubing Matters
Hey, remember those times when you struggled with a gloss that leaked in your purse or found it challenging to get the last bit out? Frustrating, right? The right tubing isn’t just about aesthetics; it’s about functionality and durability too. Selecting a good quality tube ensures:
- No wastage: You get every drop of the gloss you painstakingly made.
- Longevity: The gloss remains uncontaminated and fresh for longer.
- Portability: You can toss it in any bag without worrying about messy surprises.
Types and Materials to Consider
Now, when it comes to choices, the market is flooded with options. But how do you choose? Let’s simplify:
- Plastic Tubes: Lightweight and commonly used, these are great for beginners. Many come with built-in applicators too.
- Glass Tubes: These have a more premium feel and are eco-friendlier. Just be a tad more careful with drops.
- Squeeze Tubes: Prefer a softer, more pliable container? Squeeze tubes might be your pick. They’re especially handy for thicker glosses.
- Roller Balls: If you’re making a gloss that’s a tad more liquid, roller balls ensure easy and mess-free application.
So, before you dive into shades and flavors, take a moment to pick the perfect home for your gloss. After all, it’s the first thing you (and everyone else) will see!
Custom Lip Gloss Tubes
Ah, custom lip gloss tubes! This is where your creativity really gets to shine. Ever thought of your lip gloss as an extension of your personality? Well, with custom tubes, it’s not just about what’s inside; it’s about showcasing you on the outside too.
Benefits of Personalization
Let’s face it, the beauty world is saturated. With so many products on the shelves, how does one stand out? Here’s where customizing your lip gloss tubes comes into play:
- Unique Identity: Have a favorite color, pattern, or even a motto? Splash it on your tube! It becomes an instant conversation starter.
- Gift Potential: Custom tubes, filled with lip gloss you made, can be an unforgettable, heartfelt gift. Birthday present, bridesmaid gift, or just a ‘thinking of you’ token, it always hits the right note.
- Branding: If you’re thinking of scaling up and perhaps selling your lip gloss, a custom tube is a cornerstone of your brand’s visual identity.
Sourcing and Design Tips
Ready to embark on the custom tube adventure? Here are some pointers to get you started:
- Research Vendors: Look for companies that specialize in custom cosmetic packaging. Read reviews, ask for samples, and ensure they align with your vision and budget.
- Go Digital: Use online design tools to visualize your tube before committing. It helps to see a digital mock-up to ensure the colors, fonts, and designs merge seamlessly.
- Stay True to You: While it’s tempting to follow trends, remember, this is your creation. What resonates with you? Is it pastel shades, bold graphics, or maybe minimalist chic? Go with it.
- Quality Matters: Ensure the print doesn’t wear off easily, and the tube material doesn’t compromise the gloss’s integrity. Your beautiful gloss deserves a home that’s not just pretty but also durable.
Custom tubes are more than just containers; they’re canvases. Canvases that celebrate your uniqueness, passion, and artistry. So, get designing and let your gloss dazzle inside and out!
Lip Gloss Supplies

Welcome to the toolkit of a lip gloss artisan! You see, creating the perfect gloss is a bit like whipping up a gourmet dish – the right tools make all the difference. And just like any artist, your toolkit is pivotal in ensuring your vision comes to life flawlessly.
Essential Tools for Gloss Making
Before the fun of mixing and experimenting begins, you’ll want to gather these essentials:
- Mixing Bowls: Preferably glass or stainless steel, these ensure no unwanted reactions with your gloss ingredients.
- Pipettes: Precision is key! Especially when adding pigments or oils, these little tools help you get the quantity just right.
- Spatula: To ensure thorough mixing and no wastage.
- Measuring Spoons or Scales: Again, precision ensures consistency, especially if you’re making multiple batches.
- Funnel: Makes the transfer from mixing bowl to tube mess-free and easy.
- Protective Gear: Gloves, aprons, and even safety goggles might come in handy, especially when working with pigments.
Storage and Maintenance
Now that you’ve got your gloss, here’s how you ensure its longevity and keep your supplies in tip-top shape:
- Cool, Dark Places: Direct sunlight or excessive heat can alter your gloss’s texture and color. Always store in a cool, dark place.
- Cleanliness is Paramount: Always clean and, if possible, sterilize your tools post-use. Any residue can contaminate your next batch.
- Label Everything: Especially if you’re trying out different recipes. Mention the date of making, ingredients used, and maybe even the shade name.
- Regularly Check Inventory: Some ingredients, especially organic ones, have a shelf life. Regular checks ensure you don’t use expired ingredients.
- Keep Tools Separate: It’s a good practice to have a set of tools dedicated only to your gloss-making endeavors. This avoids cross-contamination.
Remember, the journey of crafting your gloss is as delightful as flaunting it. With the right supplies in hand and proper care, each batch you whip up will be a testament to your passion and craftsmanship. Happy gloss-making!
Crafting Your Perfect Lip Gloss
Dive right into the heart of gloss creation! Here’s where you get to play, experiment, and curate a lip gloss that’s uniquely you. From pigments to flavors and even crafting your own lip oil, it’s all about customization and personal touch.
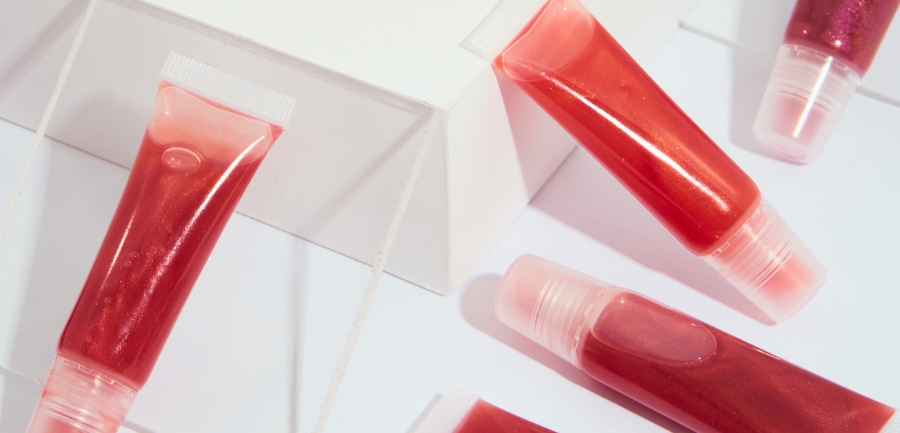
Lip Gloss Pigment
Color, shimmer, or maybe a sultry matte? Pigments set the mood and feel of your lip gloss, making them a critical choice in your creation journey.
Choosing the Right Shades:
- Think about your daily wear. Are you leaning toward neutrals or bold reds?
- Consider the undertone. Cool, warm, or neutral undertones can vastly change how a color appears on different skin tones. Test a small batch before diving in!
Mixing and Customization Techniques:
- Start small. A pinch of pigment can sometimes go a long way.
- Blend colors to achieve unique shades. Ever tried combining a bright coral with a touch of gold shimmer?
Flavoring Oils for Lip Gloss
Who said taste doesn’t matter in a gloss? From fruity to minty and even dessert flavors, oils can make applying lip gloss a delightful sensory experience.
Enhancing the Lip Gloss Experience:
- Flavors can elevate the feel of your gloss. A little mint can be refreshing in summer, while vanilla feels cozy in colder months.
- Don’t go overboard. A hint of flavor is often enough without being overpowering.
Top Flavor Choices:
- Classics: Vanilla, Strawberry, and Mint.
- Exotic Picks: Mango, Coconut, or even a touch of Chocolate.
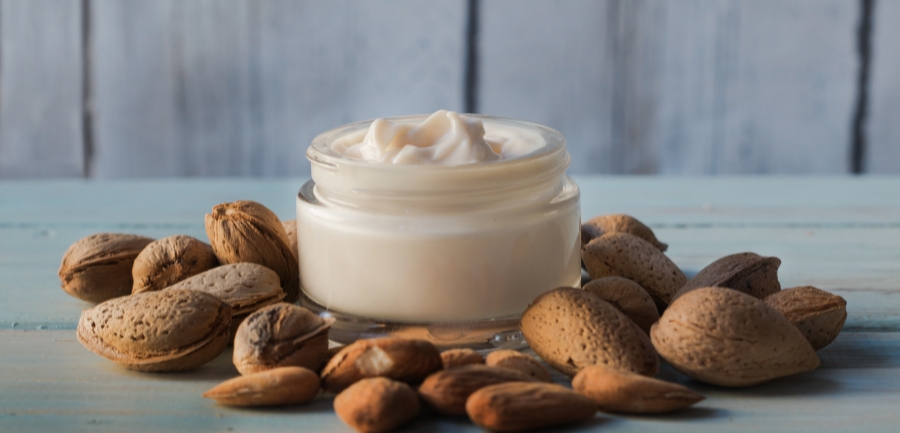
DIY Lip Oil
Before the pigment and flavor, comes the base. Crafting a nourishing lip oil ensures your gloss not only looks good but also feels amazing on the lips.
Crafting a Nourishing Base:
- Base oils like jojoba, almond, or coconut provide hydration.
- Consider adding Vitamin E for its antioxidant properties and a smoother texture.
Ingredients and Proportions:
- Keep a balance. While oils provide moisture, too much can make the gloss runny.
- Research or experiment with proportions. Typically, a few drops of essential flavor oils to a base oil mixture will suffice.
Remember, creating your lip gloss is as much about the process as the product. Embrace the trials, the errors, and the moments of eureka! In the end, you’ll have something tailor-made, just for you.
Personalizing Your Lip Gloss
Diving into the world of lip gloss means carving out a space that’s uniquely yours. But beyond the shade, texture, and feel, how you present and package your creation is paramount. Let’s delve into the fun world of naming your lip gloss and creating a signature look with custom tubes.
Names for Lip Glosses
Ah, the thrill of naming your creation! It’s like naming a star in a beautiful galaxy. A name gives identity, character, and a hint of the story behind your gloss.
Inspiration and Ideas:
- Think of the shade: ‘Sunset Coral’ or ‘Midnight Plum’ can evoke vivid imagery.
- Use puns or playful words: ‘Gloss’ and found? Maybe ‘Glossip Girl’ or ‘Shine & Dine’.
- Dive into emotions or experiences. ‘First Date Blush’ or ‘Beach Day Bronze’ can resonate with many.
Importance of a Catchy Name:
- Recognition: A catchy name is memorable and can be a conversation starter.
- Branding: If you’re considering selling, names play a pivotal role in brand recall.
- Personal Touch: It reflects your creativity and the love poured into the making.
Custom Lip Gloss Tubes
Your gloss might be a stunner, but the first impression often lies in its packaging. Custom tubes can elevate your creation, making it feel truly special.
Benefits of Personalization:
- Stand Out: In a sea of beauty products, a unique tube can catch an eye instantly.
- Emotional Value: Personal touches, be it a color or a design, add sentimental value, especially if gifting.
- Branding Potential: If you’re venturing into selling, custom tubes form a significant part of your brand’s visual appeal.
Sourcing and Design Tips:
- Find Reliable Suppliers: Check reviews, ask for samples, and ensure the quality matches your expectations.
- Experiment with Design: Play with colors, fonts, and graphics. Maybe even collaborate with a designer for a professional touch.
- Durability is Key: The design should not easily wear off, and the tube should protect the gloss inside.
Your lip gloss is a reflection of your style, creativity, and passion. By naming it aptly and packaging it beautifully, you’re not just presenting a product; you’re sharing a piece of yourself with the world. Shine on! Top of Form
Special Lip Gloss Variants
In the expansive universe of lip glosses, there are stars that shine just a tad brighter due to their unique ingredients and benefits. Let’s traverse through the fascinating worlds of honey-infused glosses and those made organically, understanding what makes them so enchanting.
Honey Gloss
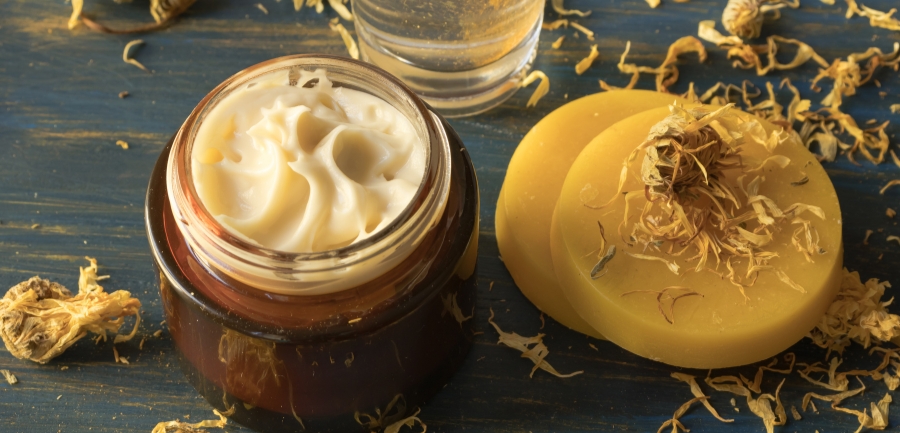
Harnessing the power of nature, honey gloss is more than just a beauty enhancer. It’s a nod to the golden elixir that has been celebrated for centuries.
Benefits and Features:
- Natural Moisturizer: Honey is a natural humectant, drawing moisture to the lips, and keeping them hydrated.
- Healing Properties: Got chapped lips? The anti-inflammatory properties of honey can help soothe and heal.
- Subtle Sweetness: Adds a gentle, natural sweetness to your gloss for a delightful application experience.
- Natural Shine: Honey imparts a glossy, high-shine finish that’s irresistibly plush.
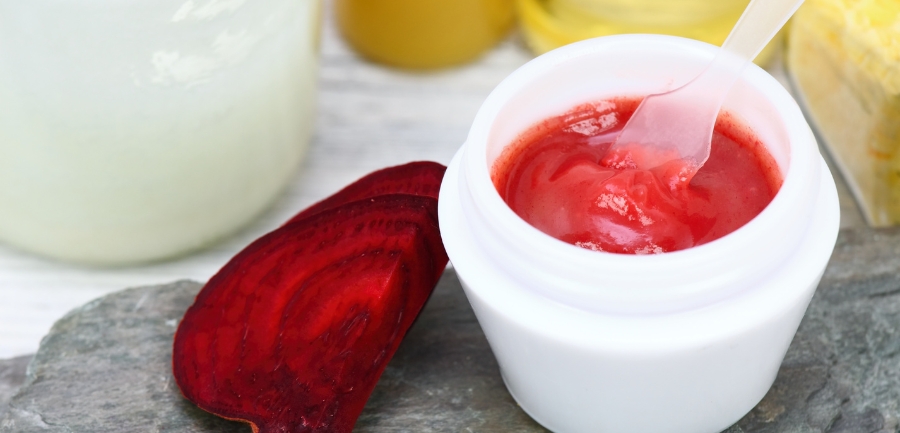
Incorporating Honey in Your Recipe:
- Blend Well: Honey, being thicker than most gloss ingredients, requires thorough mixing.
- Right Proportion: Too much can make the gloss sticky. Start with a small quantity and adjust based on consistency and taste.
- Quality Matters: Use raw, organic honey for maximum benefits and purity.
Organic Lip Gloss
In an age where ingredient-conscious choices are gaining momentum, organic lip gloss stands tall, blending beauty with responsibility.
Benefits and Features:
- Skin-Friendly: Made without synthetic chemicals, they’re gentle on the lips.
- Eco-conscious Choice: Organic ingredients often have a smaller carbon footprint, making it a greener beauty option.
- Rich in Nutrients: Organic oils and butter are often richer in antioxidants and beneficial nutrients.
- Long-lasting Hydration: Natural ingredients often provide longer-lasting hydration compared to synthetic counterparts.
Sourcing Quality Organic Ingredients:
- Certifications: Look for credible organic certifications when buying ingredients.
- Supplier Transparency: A reputable supplier will be transparent about sourcing and processing methods.
- Research: Learn about the farms or cooperatives that produce the ingredients. Ethical sourcing is as vital as organic purity.
When you choose special lip gloss variants like these, it’s not just about beauty. It’s about wellness, sustainability, and cherishing nature’s bounty. A swipe of such gloss reflects not just your aesthetic preferences, but your values too. Embrace the special, and let your lips tell a story.
Essential Lip Gloss Tips and Kits

Delving into the world of lip gloss also means mastering the techniques to make it look impeccable and knowing the must-haves for a DIY endeavor. Here, we’ll unpack the tips to prolong that lustrous shine and explore the art of creating the perfect gloss kit.
How to Make Lip Gloss Last Longer
You’ve crafted the perfect shade with the exact shine, but how do you make it stay? Let’s uncover the secrets to enduring gloss allure.
Application Techniques:
- Prime Your Lips: Start with a lip primer or a bit of concealer. It creates a smooth base, making the gloss adhere better.
- Layering: Apply a matching lip liner all over the lips before your gloss. It provides a foundation and can make the gloss last longer.
- Blotting: After your first coat, lightly blot with a tissue and then apply a second coat. This can seal in the color and shine.
Maintaining Shine and Color:
- Avoid Food and Drink: It might sound tricky, but oily foods can break down your gloss faster. Opt for a straw when drinking.
- Reapply Strategically: Instead of frequent full applications, just dab a bit in the center of your lips and press them together.
- End with a Sealant: There are lip sealant products available that can lock in your gloss for extended wear.
Make Your Own Lip Gloss Kit
Imagine having a kit at your disposal that houses everything you need for your gloss creations. Whether it’s for personal use or a thoughtful gift, a DIY lip gloss kit is pure joy.
Essentials to Include:
- Base Oils: Jojoba, almond, or coconut oil for hydration.
- Pigments and Micas: A variety of shades for the artist in you.
- Flavoring Oils: Vanilla, mint, strawberry – the classics and maybe a couple of exotic ones.
- Tubes or Containers: Don’t forget these for storing your gloss.
- Mixing Tools: Tiny spatulas, bowls, and maybe a mini whisk for perfect blending.
Steps to Assemble:
- Pick a Box or Bag: Choose something sturdy and perhaps with compartments.
- Organize by Type: Oils together, pigments in another section, tools in a separate pocket.
- Label Everything: Especially if you have multiple shades or flavors.
- Include a Guide: If it’s a gift, adding a small guide or set of instructions can be a sweet touch.
With these techniques and tools at your fingertips, the world of lip gloss is yours to dominate. Let each application, each mix, and each creation be a testament to your passion and skill. Ready, set, gloss! Top of Form
To Wrap It Up
Crafting your own lip gloss is a beautiful blend of art and science, allowing you to express yourself while understanding the intricacies of cosmetics. With the right knowledge, tools, and passion, you can transform simple ingredients into lip glosses that rival store-bought brands. Whether you’re creating for yourself or gifting to others, the joy of making and wearing your own gloss is unparalleled. Dive into this glossy journey, and let your lips do the talking. Shine on!
FAQs
How to make lip gloss at home?
Melt beeswax and a carrier oil (like coconut) together, add color using cosmetic mica or lipstick bits, then mix in a flavor or essential oil and transfer to tubes.
What are the ingredients in homemade lip gloss?
Typical ingredients include beeswax, carrier oils (like jojoba or coconut), cosmetic-grade mica for color, and optional flavorings or essential oils for scent.
What ingredient makes lip gloss glossy?
The glossiness in lip gloss primarily comes from oils or butter used in its formulation, such as castor oil, which has a naturally high sheen.
How do you make lip gloss with 2 ingredients?
Combine clear petroleum jelly (Vaseline) with a bit of lipstick or cosmetic-grade mica powder for tint. Mix well and store in a small container.